PAPER
Ombre Heart Father’s Day Photo Jar – Upcycled Gift from the Heart — CraftBits.com


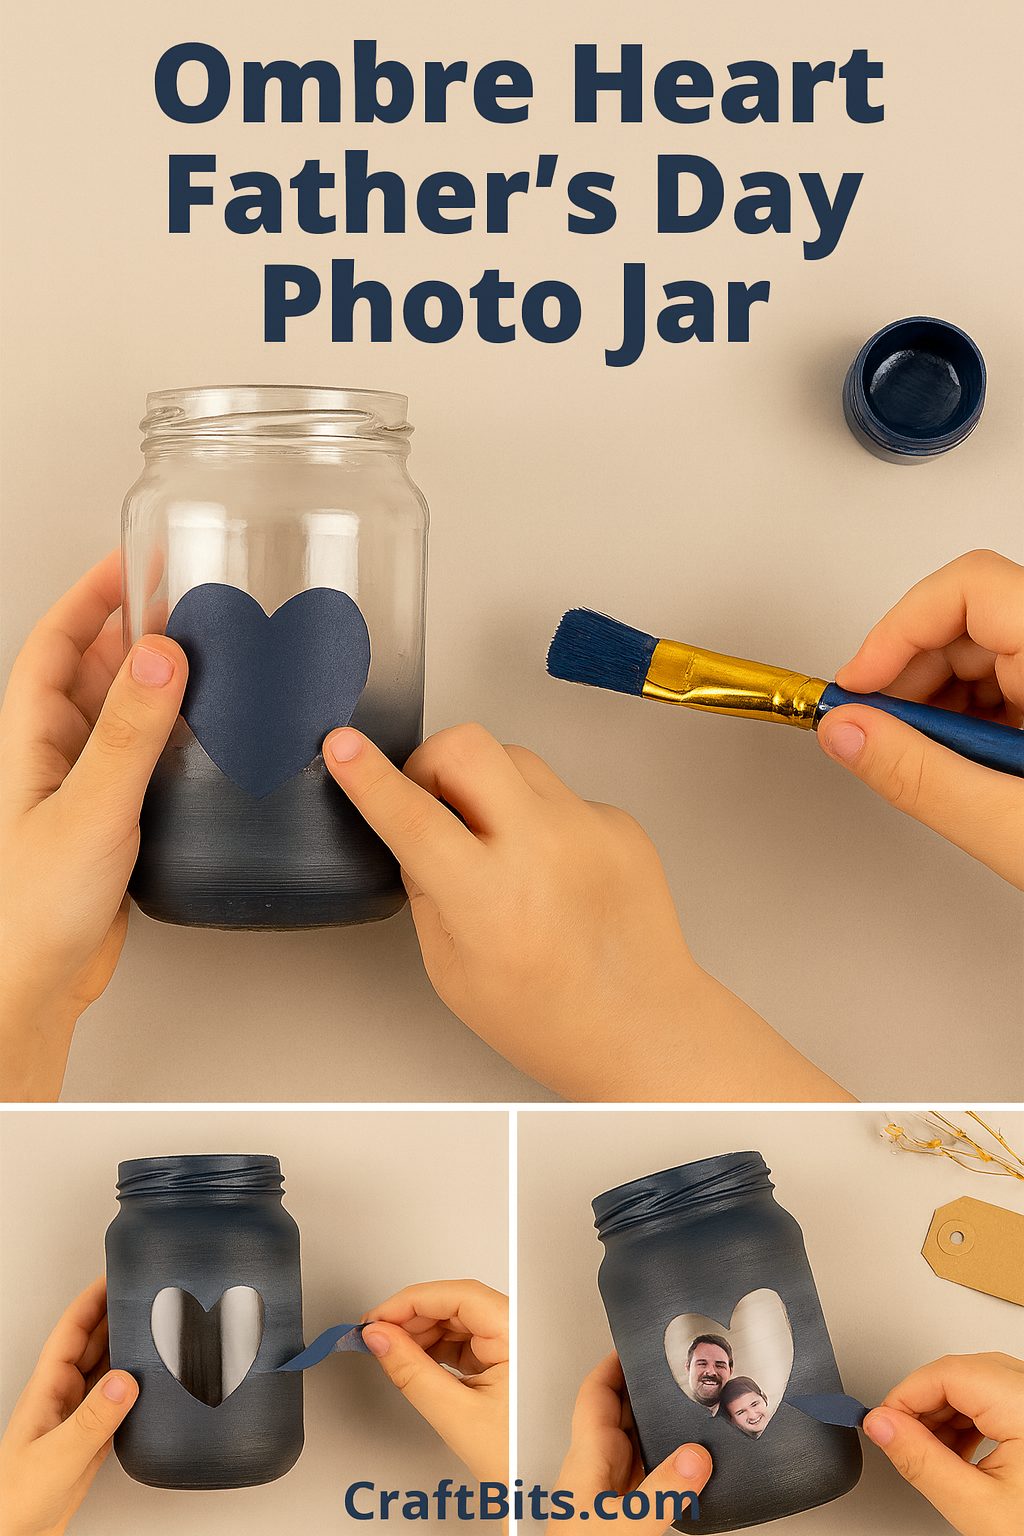
This Father’s Day, surprise Dad with something made by hand (and from the heart). This Ombre Heart Photo Jar is the perfect way to showcase a favourite father–child moment, and the best part? You can make it from a recycled jar you already have at home. It’s budget-friendly, eco-conscious, and guaranteed to bring a smile.
Get more details about this project
What you need
- Recycled glass jar – think coffee jar, pasta sauce jar, or old mason jar
- Navy, dark teal, or charcoal acrylic paint (for that “manly” ombre look)
- Painter’s tape or masking tape
- Heart template (cardstock or thick paper)
- Soft bristle paintbrush
- Printed photo of Dad and his child(ren)
- Clear-drying craft glue or Mod Podge
- Optional embellishments: jute twine, gift tag, or simple wooden charm
Instructions
Step 1 – Clean and Prep Your Jar
- Wash your recycled jar in warm, soapy water and remove all labels.
- For stubborn glue, soak a bit longer or use eucalyptus oil to loosen it.
- Make sure the jar is completely dry before painting.
- Lightly sand the outside with fine-grit sandpaper to help paint stick.
Step 2 – Mask the Heart Shape
- Cut a heart from cardstock and attach it to the jar with painter’s tape or repositionable adhesive.
- Position it where you’d like your photo to show through—usually front and centre works best.
- Press down the edges well to prevent paint bleeding underneath.
Step 3 – Paint the Ombre Effect
- Start at the bottom with your darkest colour and apply paint in smooth, even strokes.
- Add a little white or lighter tone to your brush as you move upward, blending gently to create a gradient.
- Work your way up to a lighter shade at the top of the jar.
- Let the paint dry completely.
Step 4 – Reveal the Heart
- Carefully peel away the heart template to reveal the clear glass window.
- Check edges for any paint bleed—touch up gently with a cotton bud if needed.
Step 5 – Add the Photo
- Trim your chosen photo so it fits neatly inside the heart shape when viewed from the outside.
- Use clear-drying glue or Mod Podge to attach the photo to the inside of the jar, facing outward.
Step 6 – Optional Finishing Touches
- Wrap jute twine around the neck of the jar for a rustic look.
- Add a small wooden tag with “Dad” or a short message burned or written on it.
- Keep it simple—this is a masculine, understated design.
Step 7 – Gift and Enjoy
Fill the jar with Dad’s favourite snacks, wrapped sweets, or even a rolled-up handwritten letter from the kids. It’s both a keepsake and a useful gift he’ll love keeping on his desk or shelf.
This design also works for other occasions—just change the paint colours and the photo to suit birthdays, anniversaries, or even Christmas.
Related


